|
For many years, the only options for 18th century style pistol replicas were either to buy a custom made piece or to order one of the few models of more or less historical replica pistols that were around. There were an assortment of somewhat hideous "Kentucky" pistols, mostly made in Spain and copies of nothing in particular. There were 1777 French pistols by Palmetto Arms. There were those miserable Japanese "Tower" pistols that still continue to haunt the reenacting world, and there were two types of Scottish pistols.
One type of Scottish pistol was the brass framed "black watch" pistol that was made by Palmetto. The other type was (and is) the steel framed Murdoch. Back when I first got into reenacting close to 30 years ago, the only source for Murdoch pistols was Dixie Gun Works. They cost more than the other replica pistols of the era but they certainly looked cool! The problem is, Dixie sold them and continues to sell them unvented.
Now an unvented gun shouldn't be much of a challenge if you happen to be skilled in black powder gunsmithing. You never know what you are going to find once you start tearing the gun down, though and in reality an unvented gun should be viewed as more of an unfinished kit gun than a working gun that just needs a hole drilled in it.
This particular gun was sent in by someone who had bought it from Dixie then brought it to the local modern gunsmith who promptly did unspeakable damage to it. He had broken off one, possibly two drill bits in such a way that they pinned the breechplug to the barrel. A torch was involved too, as there were burn marks and heat discoloration all over the poor thing. As a crowning insult, the decorative filework on the breech of the barrel was buggered up pretty bad, either with vise jaws or a pair of pliers. For what it is worth, a person doesn't have to pass any competency tests to be a gunsmith and anyone taking a historic style gun to a gunsmith who does not specialize in such work does so at their own peril.
I had my work cut out for me. The good news is that I had the presence of mind to take pictures along the way. Follow along in the fun below!
Click on the photos below to see a larger image.
| |
|
|
|
|
Here is where the project started for me. It arrived looking kind of sad. You can see the discoloration and the messed up attempted vent hole with at least one drill bit broken off in it. |

|
| |
|
|
|
|
Hmmm...let's flip this thing over and see how far that discoloration goes. Ouch, look at the plier/vise damage. |

|
| |
|
|
|
|
My guess is that someone tried to apply a lot of heat to the barrel in an attempt to get the breech plug out. It didn't work. We will see why later on.
|

|
| |
|
|
|
|
One more look at it from the pan, then we'll open it up to see what it looks like inside.
|

|
| |
|
|
|
|
Yup, that is a hole all right. Sure, it is egg shaped, too big and has a hardened steel drill bit broken off in it, but it looks like a hole from here. |

|
| |
|
|
|
|
OK, we'll remove the tang screw, tap the barrel forward using a brass punch to free it from the dovetail underneath and pop the barrel out of the frame. I'm not familiar with RGM Co.
|

|
| |
|
|
|
|
Experience tells me that the breech plug is NOT coming out without doing significant damage to the barrel because the broken off drill bit is now acting as a nail, forever keeping the breechplug from unscrewing since it is pinned to the barrel. To deal with this, the first thing I had to do was take a small grinding stone in a Dremel tool and open up a depression around where the broken off bit is. Once that depression was there, I could drill into the regular steel of the breech plug and avoid the hardened steel of the broken off bit. |

|
| |
|
|
|
|
Here is another view of the process. This is kinda nerve wracking because the last thing I need is for ME to break off a bit in the damn thing too. It went OK though. Once that hole was through, I could use a tiny stone in the Dremel to grind away the broken off bit from the side. |

|
| |
|
|
|
|
Ultimately, this is how it looked. There was an angled flash channel created in the face of the breechplug. Did I mention that the reason the "gunsmith" broke off a bit in there in the first place was because the breech plug was quite a bit too long? |

|
| |
|
|
|
|
Once the bit was ground away, I got to see the breech plug that started all of this. Notice that on the end of it, there is a section of the plug sticking up that has no threads on it? This is a bigger issue than it appears. Since the plug was screwed in deep enough to deform the end of the plug on the end of the threads inside the barrel, that is what kept tension on the threads and kept it from unscrewing. Again...more on this later. Thought this was going to be simple, didn't you? |

|
| |
|
|
|
|
Here is the plug from the other side. You can clearly see where I've ground a channel in the side of it to connect the vent, or more accurately...what will BE the vent once the gaping hole in the side of the barrel has been plugged...to the chamber. |

|
| |
|
|
|
|
So now that we've ground and drilled a hole in the side of the barrel, it is time to plug it up. It is a simple drill and tap process, then a plug will screw into the hole and be welded there forever, making a nearly invisible repair. First we have to drill the hole to the proper size to tap it. |

|
| |
|
|
|
|
Mission accomplished. There is now an actual round hole in the side of the barrel. Notice how the hole interferes with the threads for the breech plug? Not a problem! |

|
| |
|
|
|
|
Now we have to thread that hole. This is done with a tap. A tap is sorta like a screw in that it has threads, but it has flutes cut in the side so it can cut away metal chips to create threads in the metal. I did this in the drill press in order to keep it square to the hole. |

|
| |
|
|
|
|
Here is how it looks from the side. |

|
| |
|
|
|
|
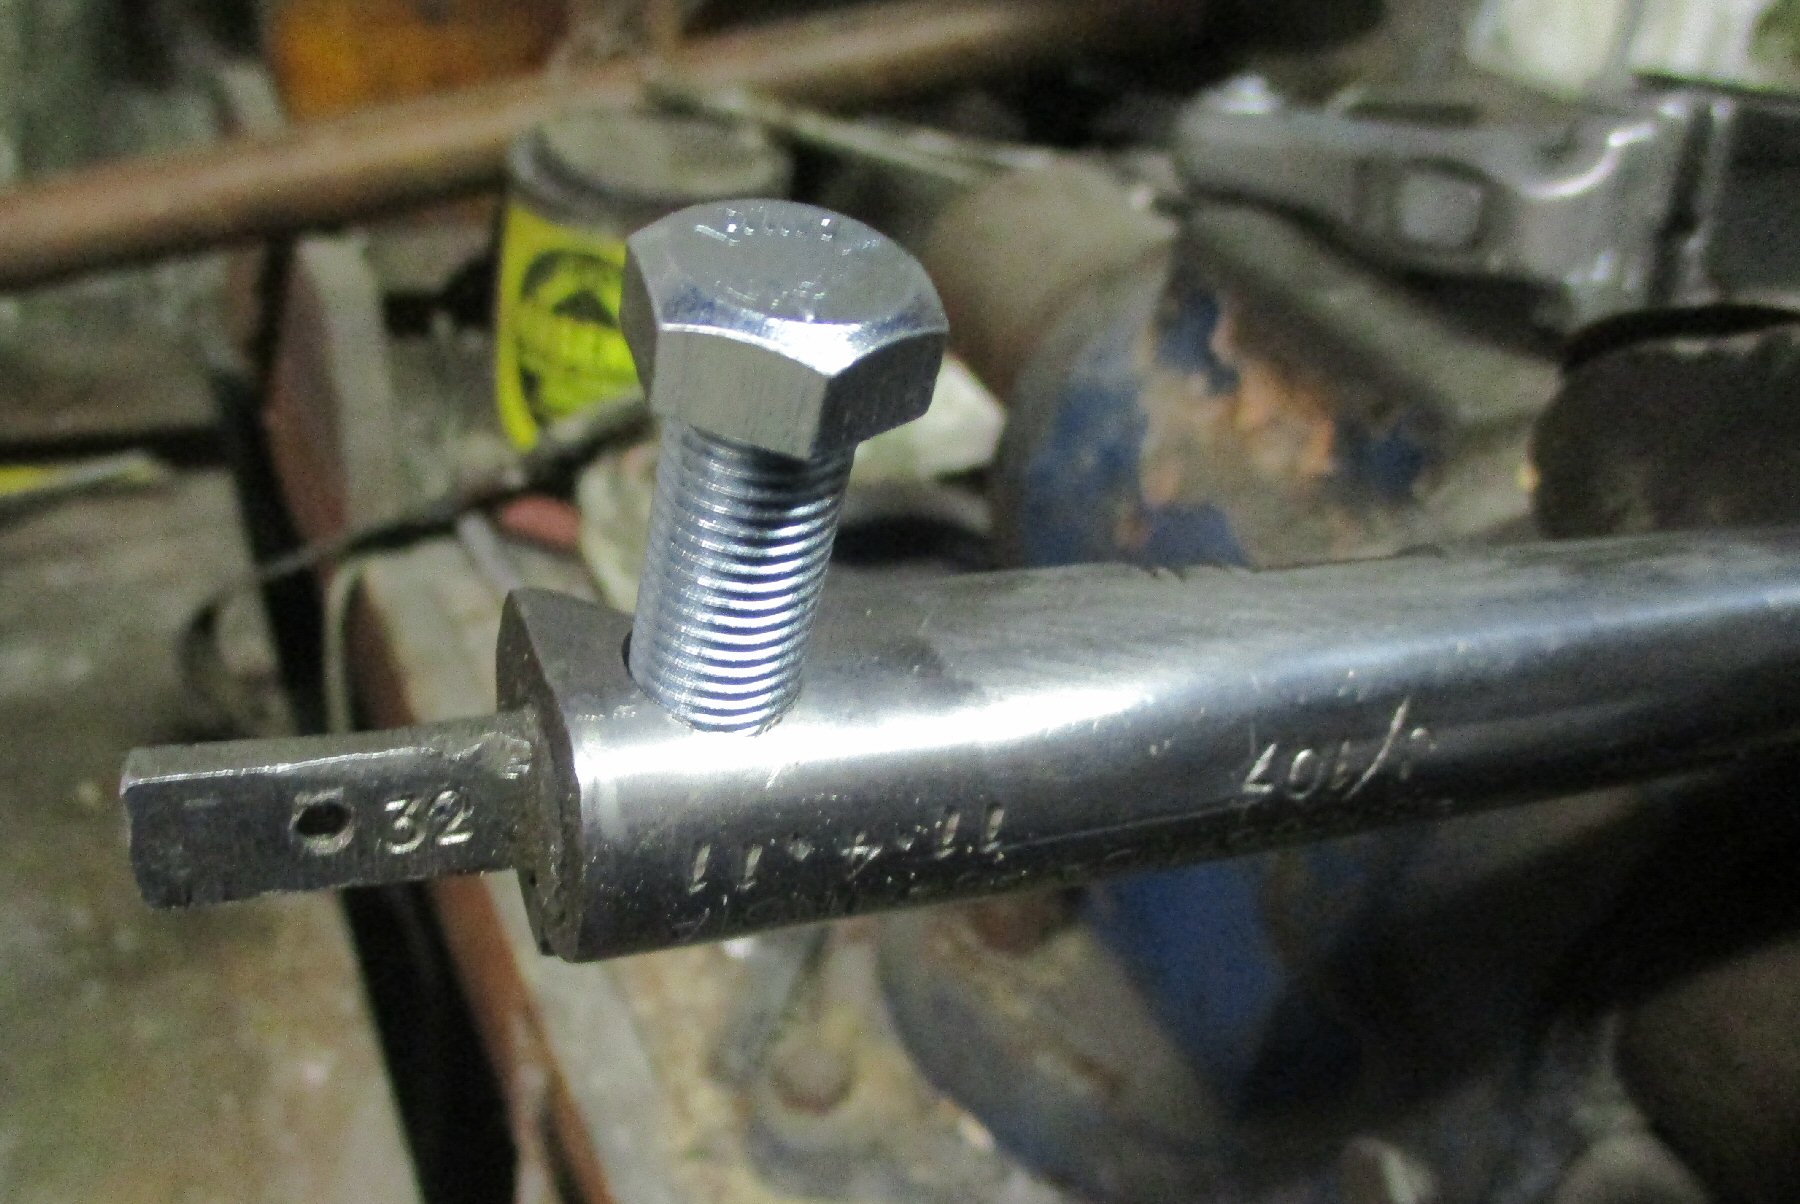
Now, what are we going to plug that tapped hole with? Let's see, what sort of metal thing is round and has threads on it...oh yeah, a machine screw. This is a 7/16-20 bolt. What you can't see is that I have ground a flat spot on the side of the breechplug for the bolt to bottom out on. This is necessary because with the extra metal cut off of the face of the breechplug, there is nothing for the plug to index off of and it could never tighten properly. With the screw cranked down, it worked like a set screw and locked the breechplug in place. |

|
| |
|
|
|
|
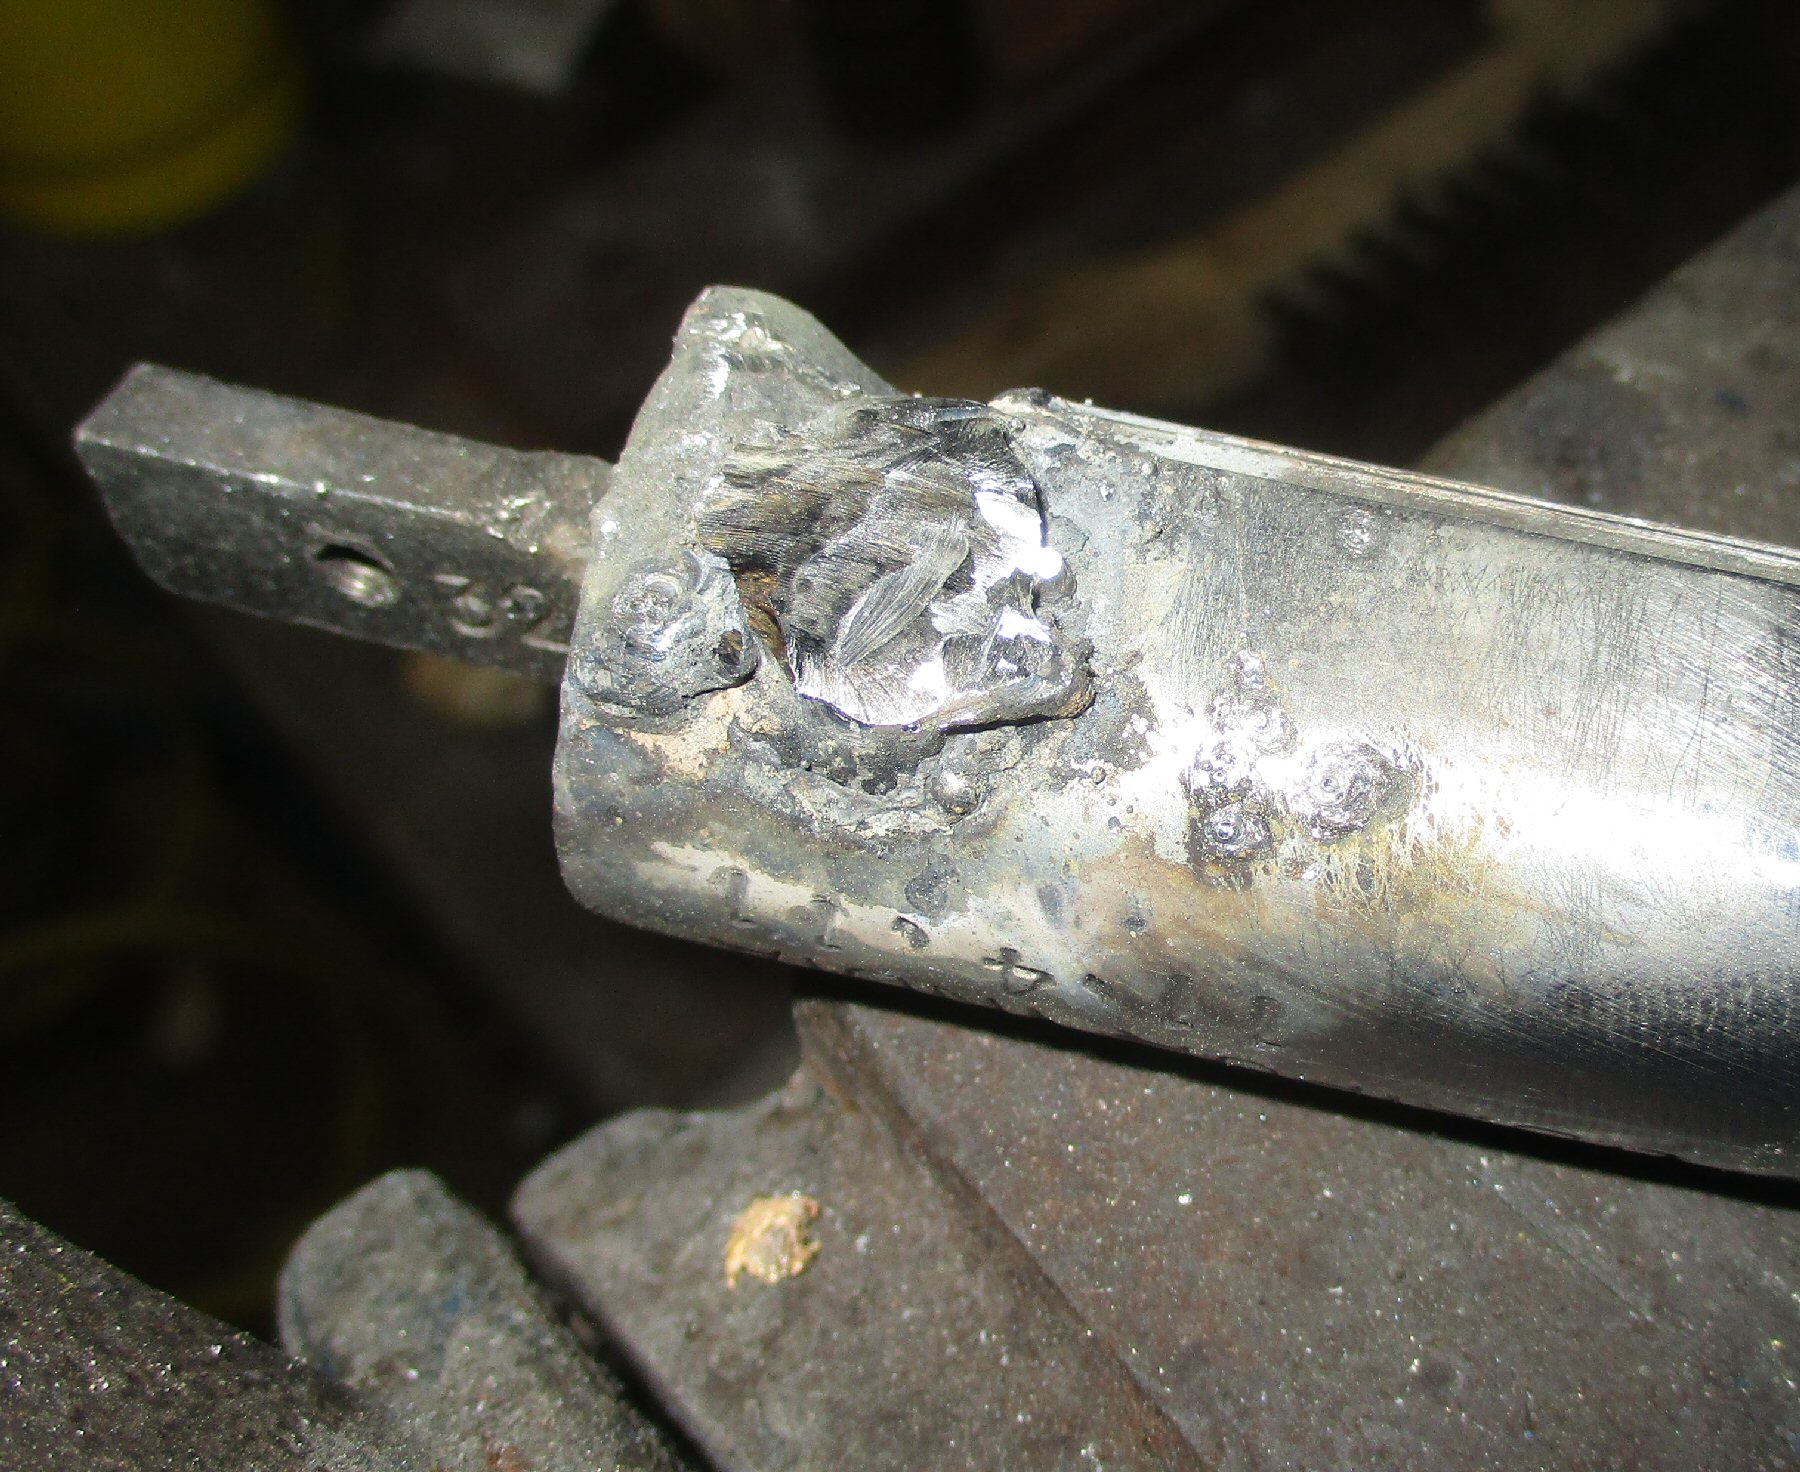
The bolt gets cut off flush with the surface of the barrel. Actually it is cut off a little proud of the surface because it will need to be sanded away to blend the repair in and this barrel still has to mate up with the pan. Then it gets welded in place. Welding the plug in place permanently attaches it to the barrel and permanently locks the breechplug in place. Don't worry. It won't stay this ugly, it will get polished down smooth and shiny. Trust me, you'll see. |

|
| |
|
|
|
|
See? Here it is all dressed down and pretty looking. This is basically the same process that you'd go through to restore a flintlock that has been converted to percussion. |

|
| |
|
|
|
|
I felt it prudent to permanently weld the breechplug in place. If someone were to not realize that the plug was in the side of the barrel and try to force the breechplug out, all sorts of badness would happen to the poor pistol. There is rarely a good reason to try to remove your breechplug, but it happens. Forcing this one out would be fatal to the barrel, so it was welded up to take away that option. |

|
| |
|
|
|
|
Here it is, all put back together and looking like a gun again. |

|
| |
|
|
|
|
...and another |

|
| |
|
|
|
|
...and finally, here it is, better than new! There are a few lessons here. First off, don't buy an unvented gun for more than what we sell a vented and tuned one for. Dixie lists these for $425 right now, we sell our version vented, inspected, tuned and ready to go for $375. (here is a link) Second, don't assume that since the local gun shop advertises that they have a gunsmith on staff that it means he knows how to do this kind of stuff. Remember that in the old days, you would apprentice for seven years or more to become a journeyman gunsmith. Today people take a 3-month correspondence course and just start hacking away at guns. Third, if you DO buy an unvented gun somewhere, be sure to check how far the breech plug sticks into the barrel before drilling the vent so you don't end up in this same mess.I have upwards of four hours into this repair and that sort of shop time adds up fast, so it is best to avoid this sort of scenario in the first place. |

|
|